Unit 1 - Introduction to Typography
Anatomy of Type Slideshow (Link)
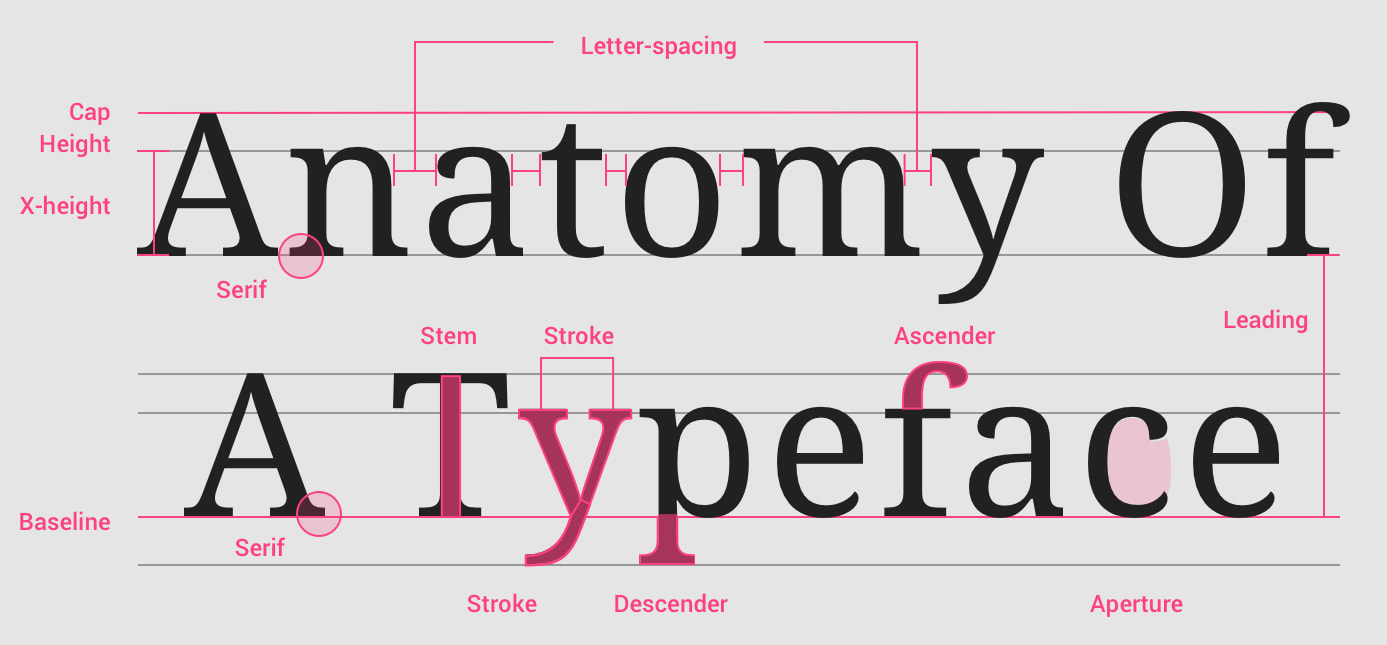
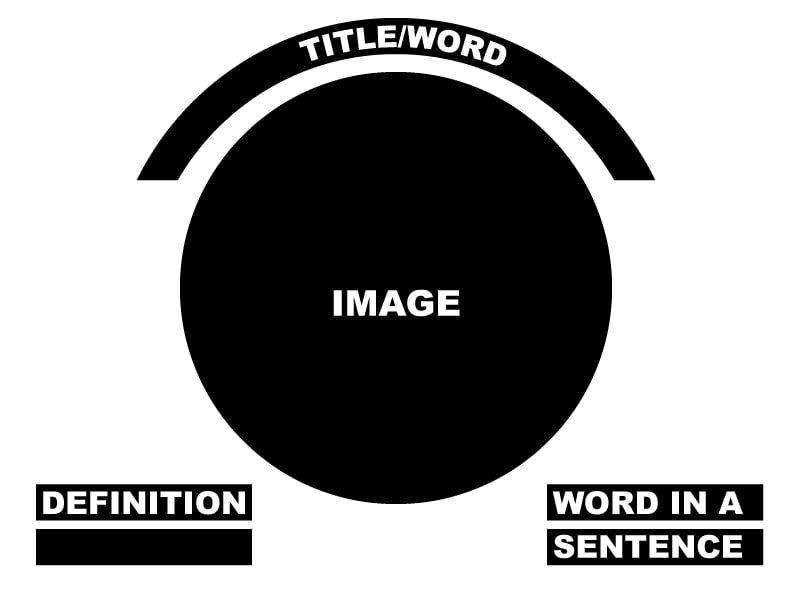
Project #1 - Anatomy of Type Illustration
SWBAT: Create their own 'Anatomy of a Typeface' illustration in Adobe Illustrator, and explain verbally and through created art typographic composition, and type anatomy
Project #2 - Drawing Type
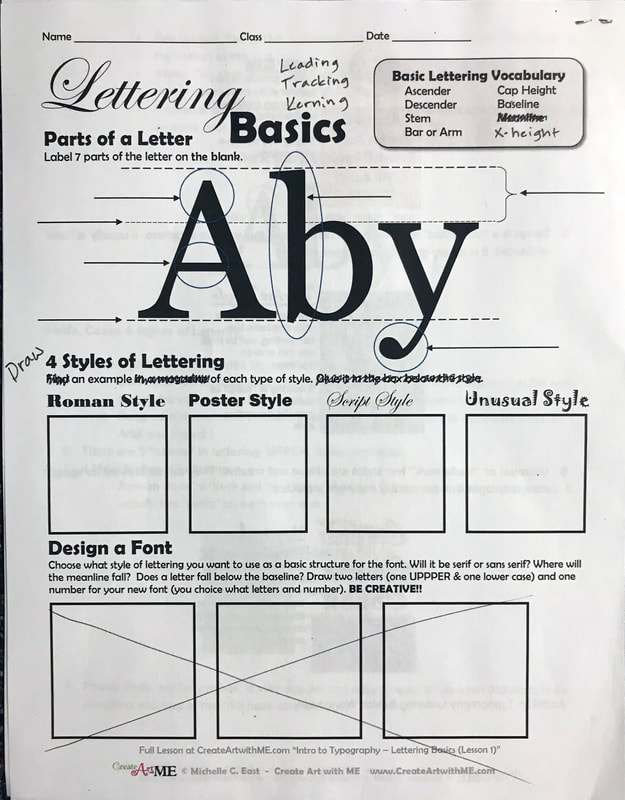
SWBAT: Hand draw all three type families (Aaa - Serif),
(Bbb - Sans Serif), (Ccc - Display/Custom File), and explain verbally and in writing the fundamental differences in the three main font families
(Bbb - Sans Serif), (Ccc - Display/Custom File), and explain verbally and in writing the fundamental differences in the three main font families
| typographyletteringbasicslessonplanandworksheet.pdf |
| draw_letters.pdf |

Project #3 - Found Font Slide (2019 Slideshow Link)
| found_font_typography_book.docx |
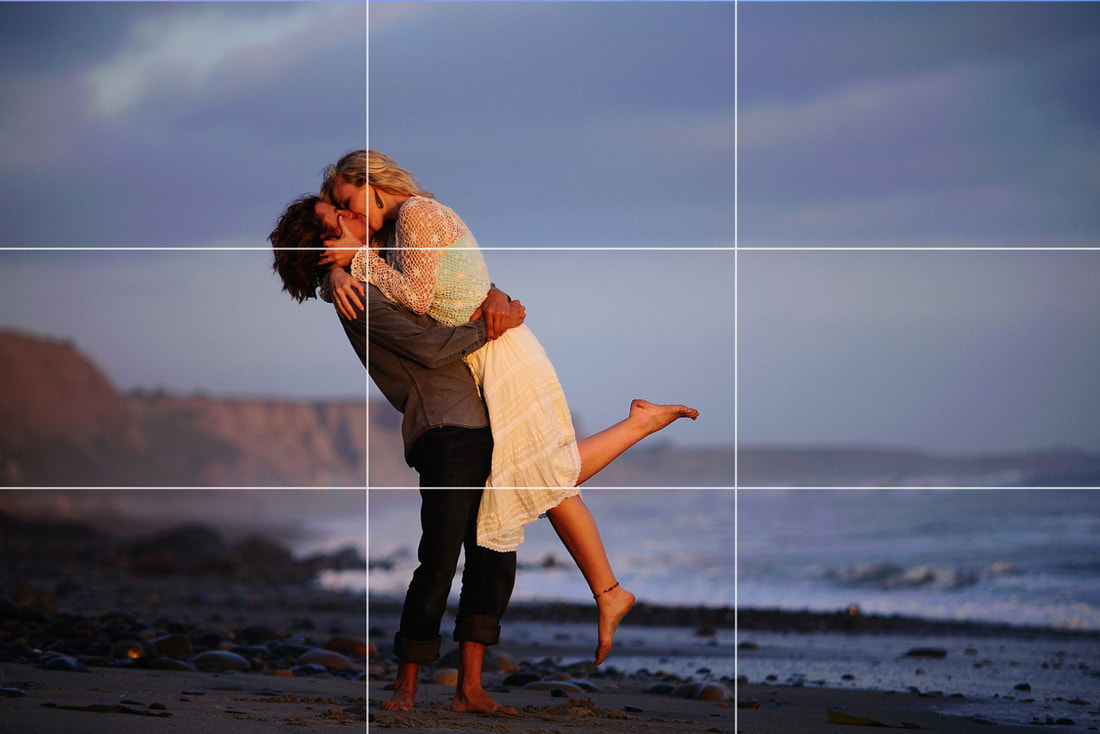
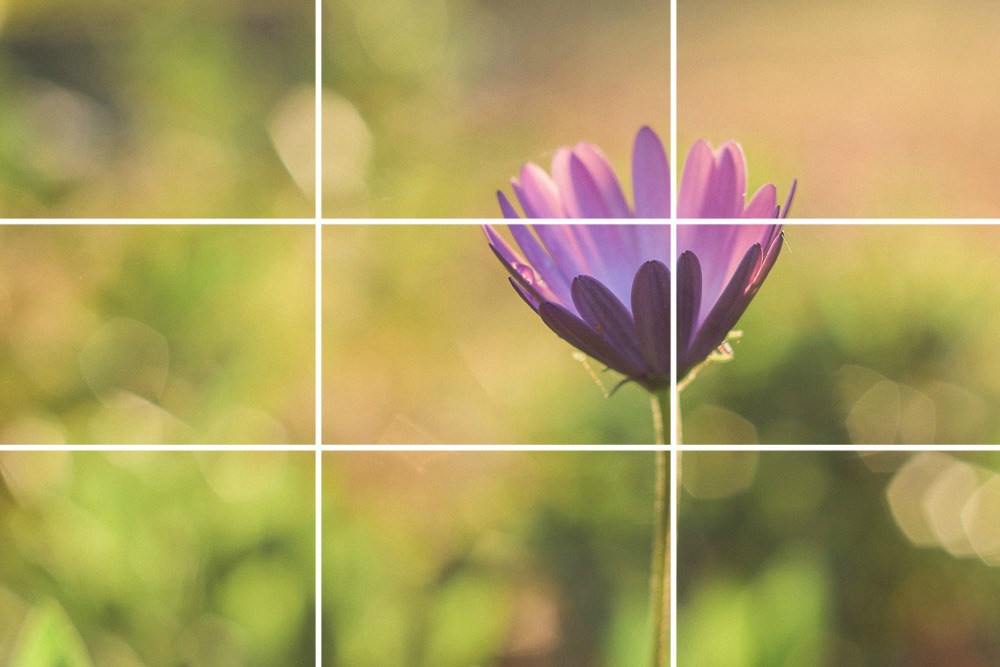
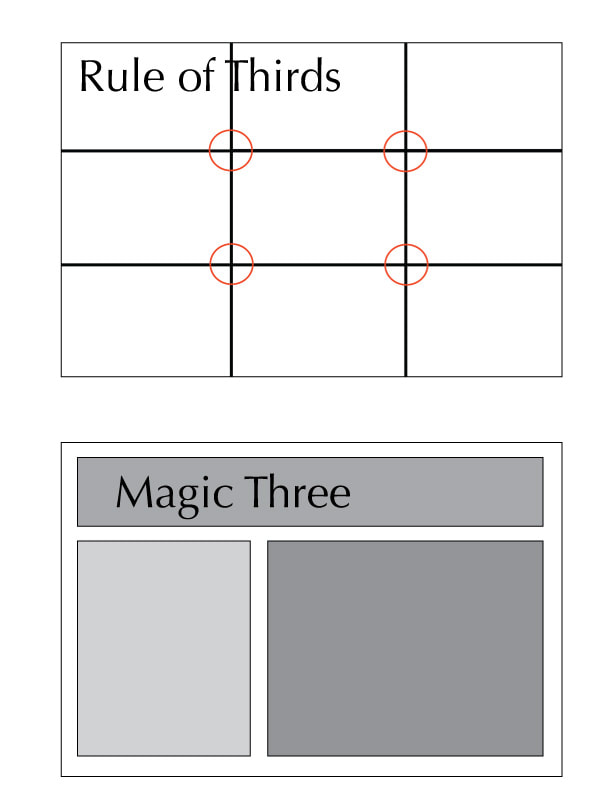
Magic THREE vs. Rule of Thirds
Project #4 - Infographics
SWBAT: Create a simple infographic for a NOUN of your choice (person, place or thing) in Adobe Illustrator that demonstrates composition and layout techniques (Magic THREE), hierarchy and color psychology
Composition and Layout (Video) |
| ||
Process in Adobe Illustrator
Day 1:
Logging In:
Choose 185 profile - password is 185chalk or 185
If there is only a Teacher profile - password is teacher
New AI file:
Open Adobe Illustrator
Choose 'Tabloid' 11"x17" document - choose orientation (Landscape or Portrait)
Image Trace:
Choose an image online and save it to the desktop of your cpu
In AI go to (File/Place) and choose image - click to place
(Make sure 'Essentials Classic' is selected across the top)
Hit Image Trace button across the top
Hit Expand button across the top
Adjust the colors and delete unwanted areas with the WHITE ARROW
Text:
For headers or titles only CLICK ONCE with type tool
For bodies of text CLICK AND DRAG with type tool
Day 2:
Custom Fonts:
Add custom fonts by going to DaFont.com
Type your title into the 'Preview' window and hit submit to see what your word looks like in that specific font
Click 'Download'... Go to downloads and click on zip file to unzip... Double click on the OTF or TTF font file
Font installer will launch in a new window - click 'Install Font'... New font should appear in AI... Remember the NAME of your new font to find it
Drop Shadows:
Copy (Command C) and Paste (Command V) shapes and then change the colors and layer them
Watermarks/Transparencies:
Select and image and then lower the Opacity in the 'Transparency' tool/window
Reversed Text:
Use the shape/rectangle tool to draw colored shapes around your text... Make sure to send the shape to the back (Object/Arrange/Send to Back or Right Click/Arrange/Send to back) and then adjust the color of the text
Day 3 (if needed):
Experiment! Make it unique!
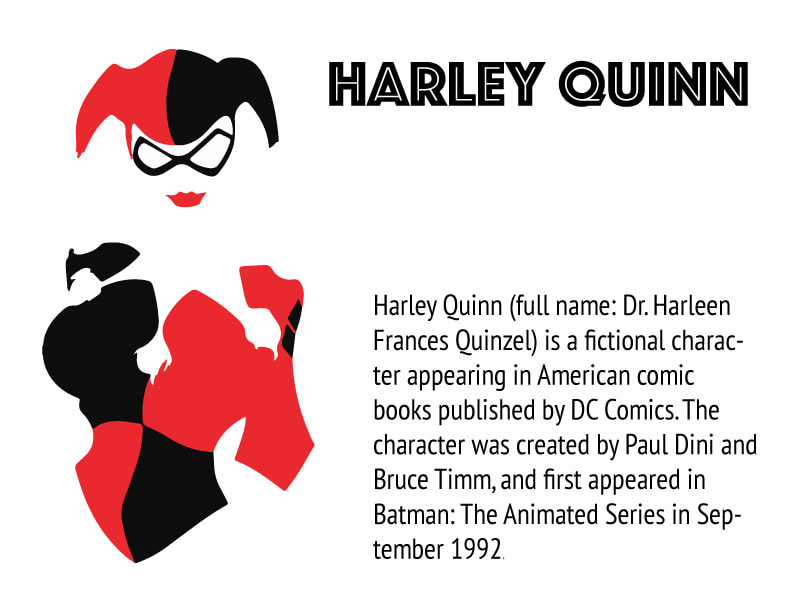
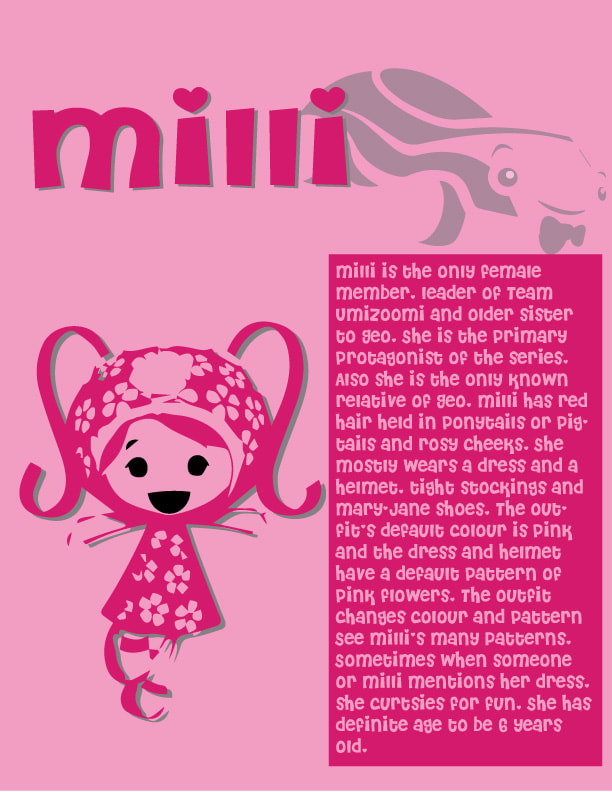
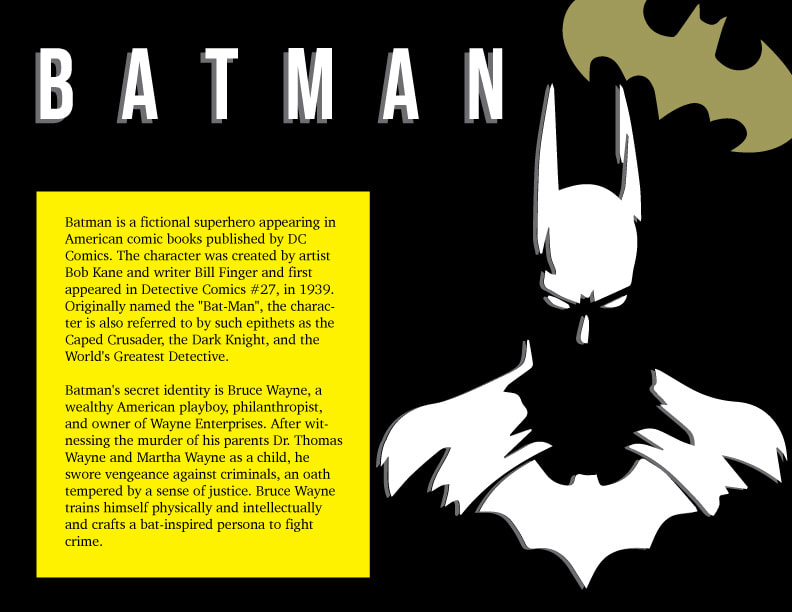
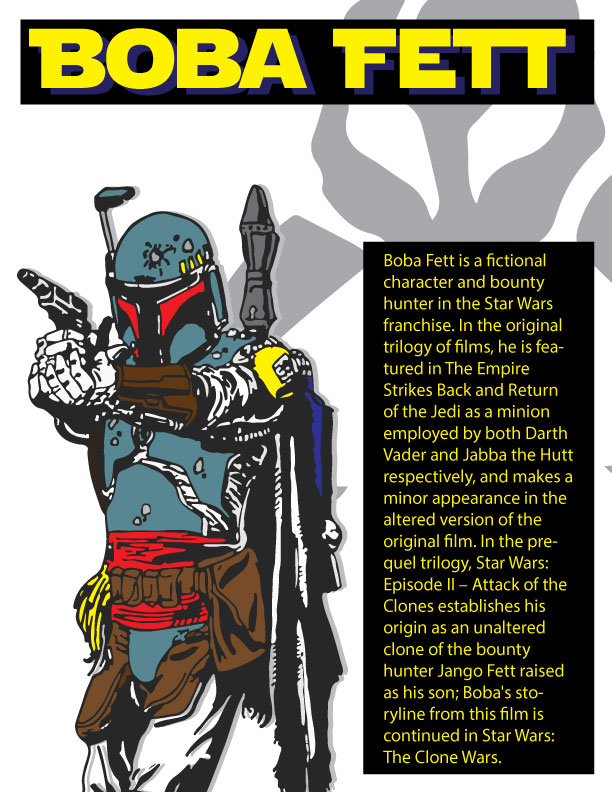
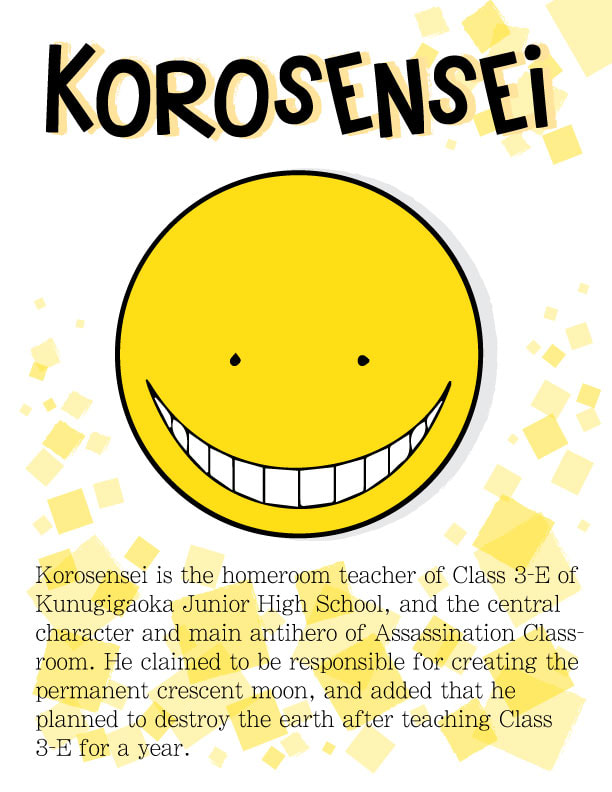
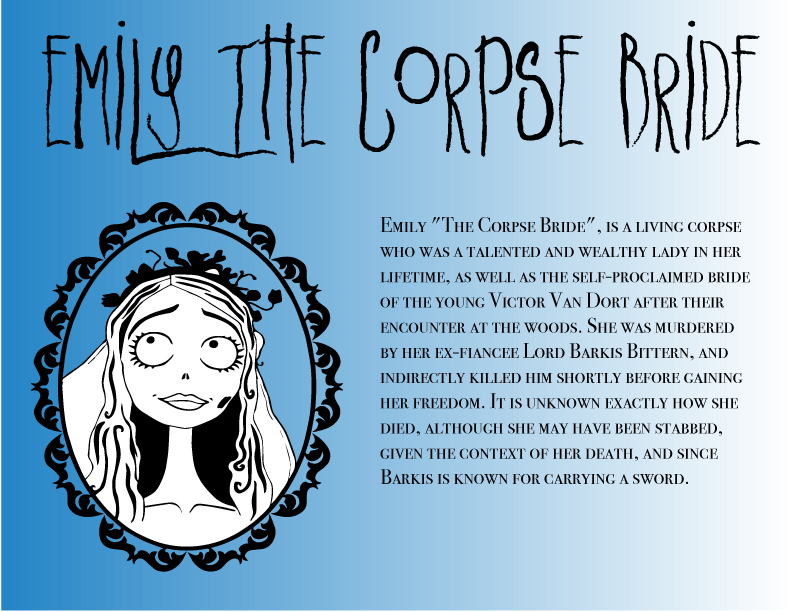
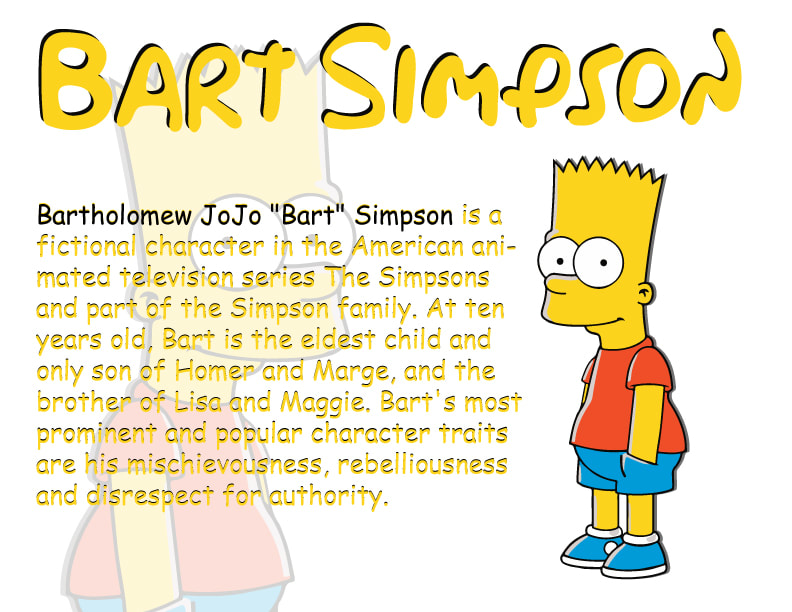
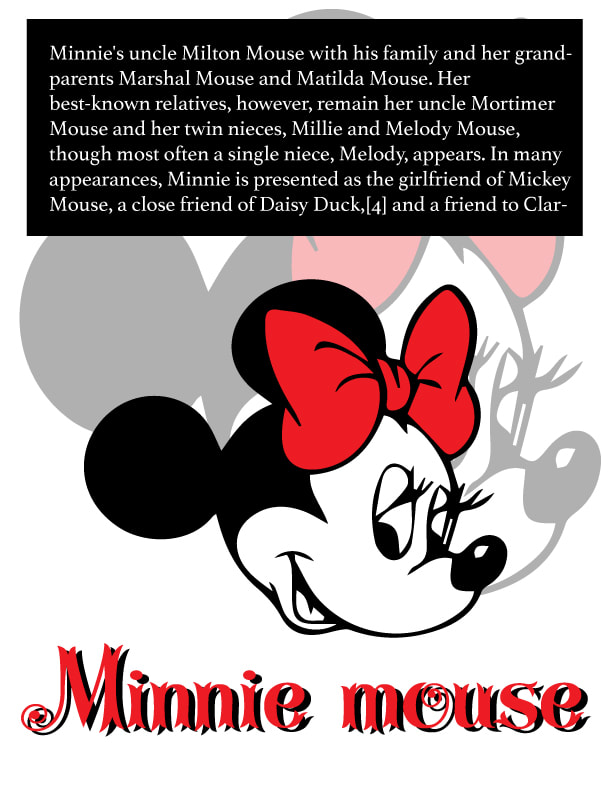
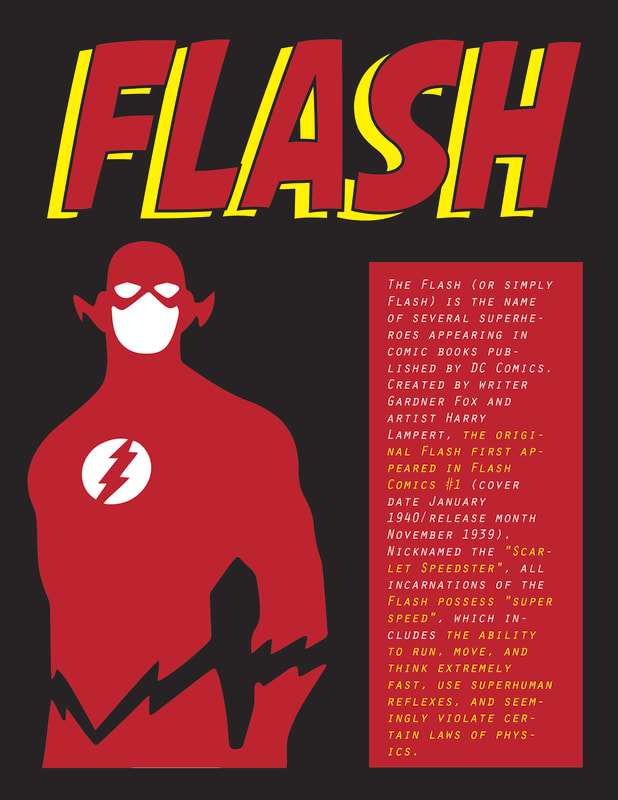
What are the similarities and differences between the two infographics below?
|

|
2018/2019 8th Grade Student Examples

Submission Questions:
1) What is the 'Magic Three'? How did you demonstrate it in your infographic?
2) What is 'hierarchy'?
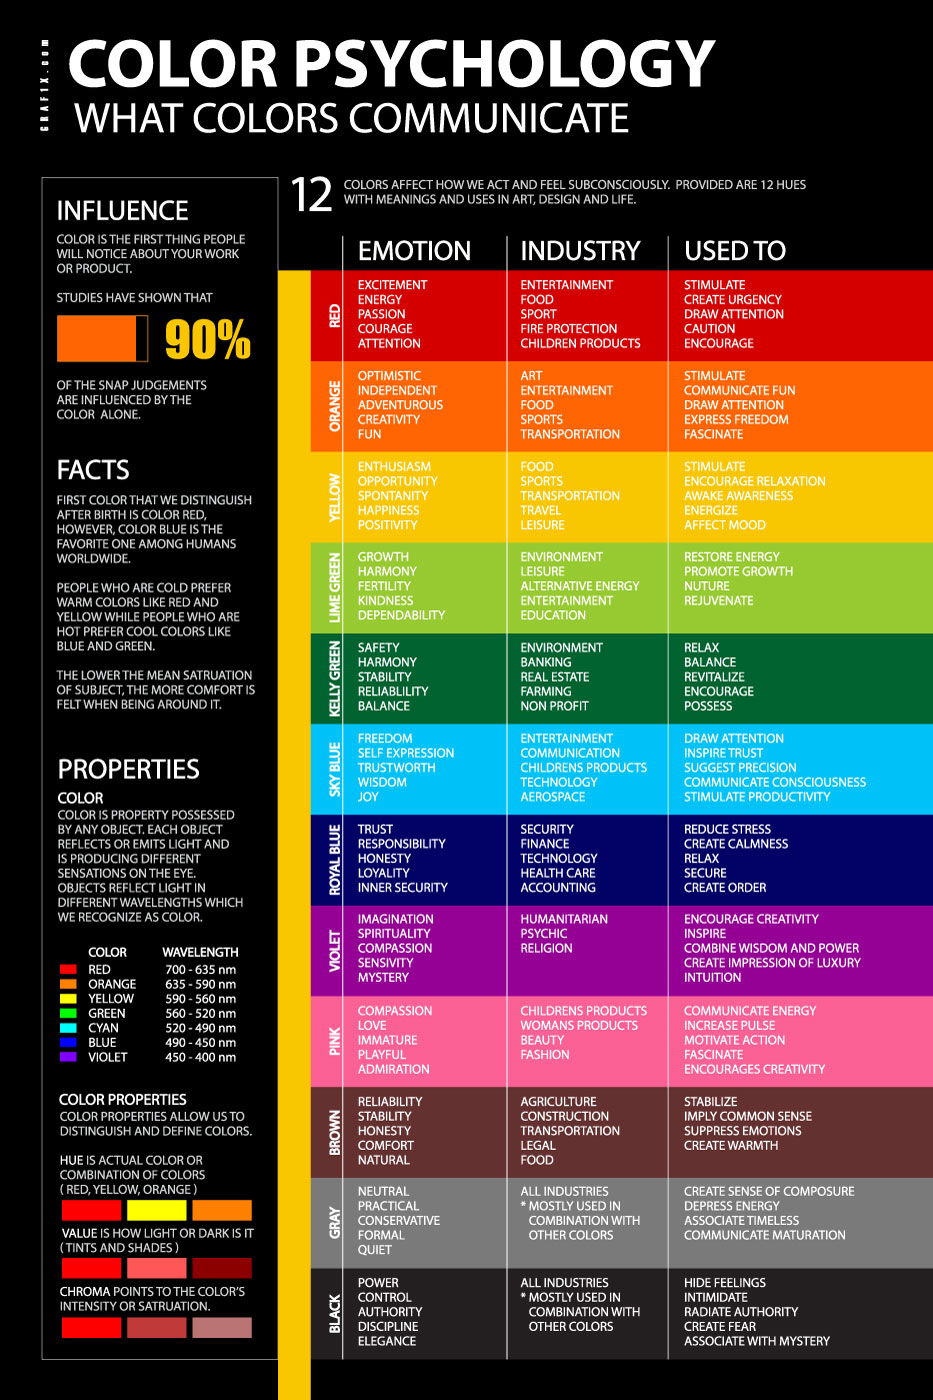
2) Use the 'Color Psychology' handout to justify the colors that you chose (DO NOT WRITE: I chose blue and red cause Spiderman is blue and red)
1) What is the 'Magic Three'? How did you demonstrate it in your infographic?
2) What is 'hierarchy'?
2) Use the 'Color Psychology' handout to justify the colors that you chose (DO NOT WRITE: I chose blue and red cause Spiderman is blue and red)
